I swear that is the one and only egg joke I intend to make. I promise it’s over now.
This is probably the last in the series of things about my grandmother for a little bit, but I wanted to recreate a project we did together when I was little, and it’s not too hard to do at home. Introducing the silhouette egg:
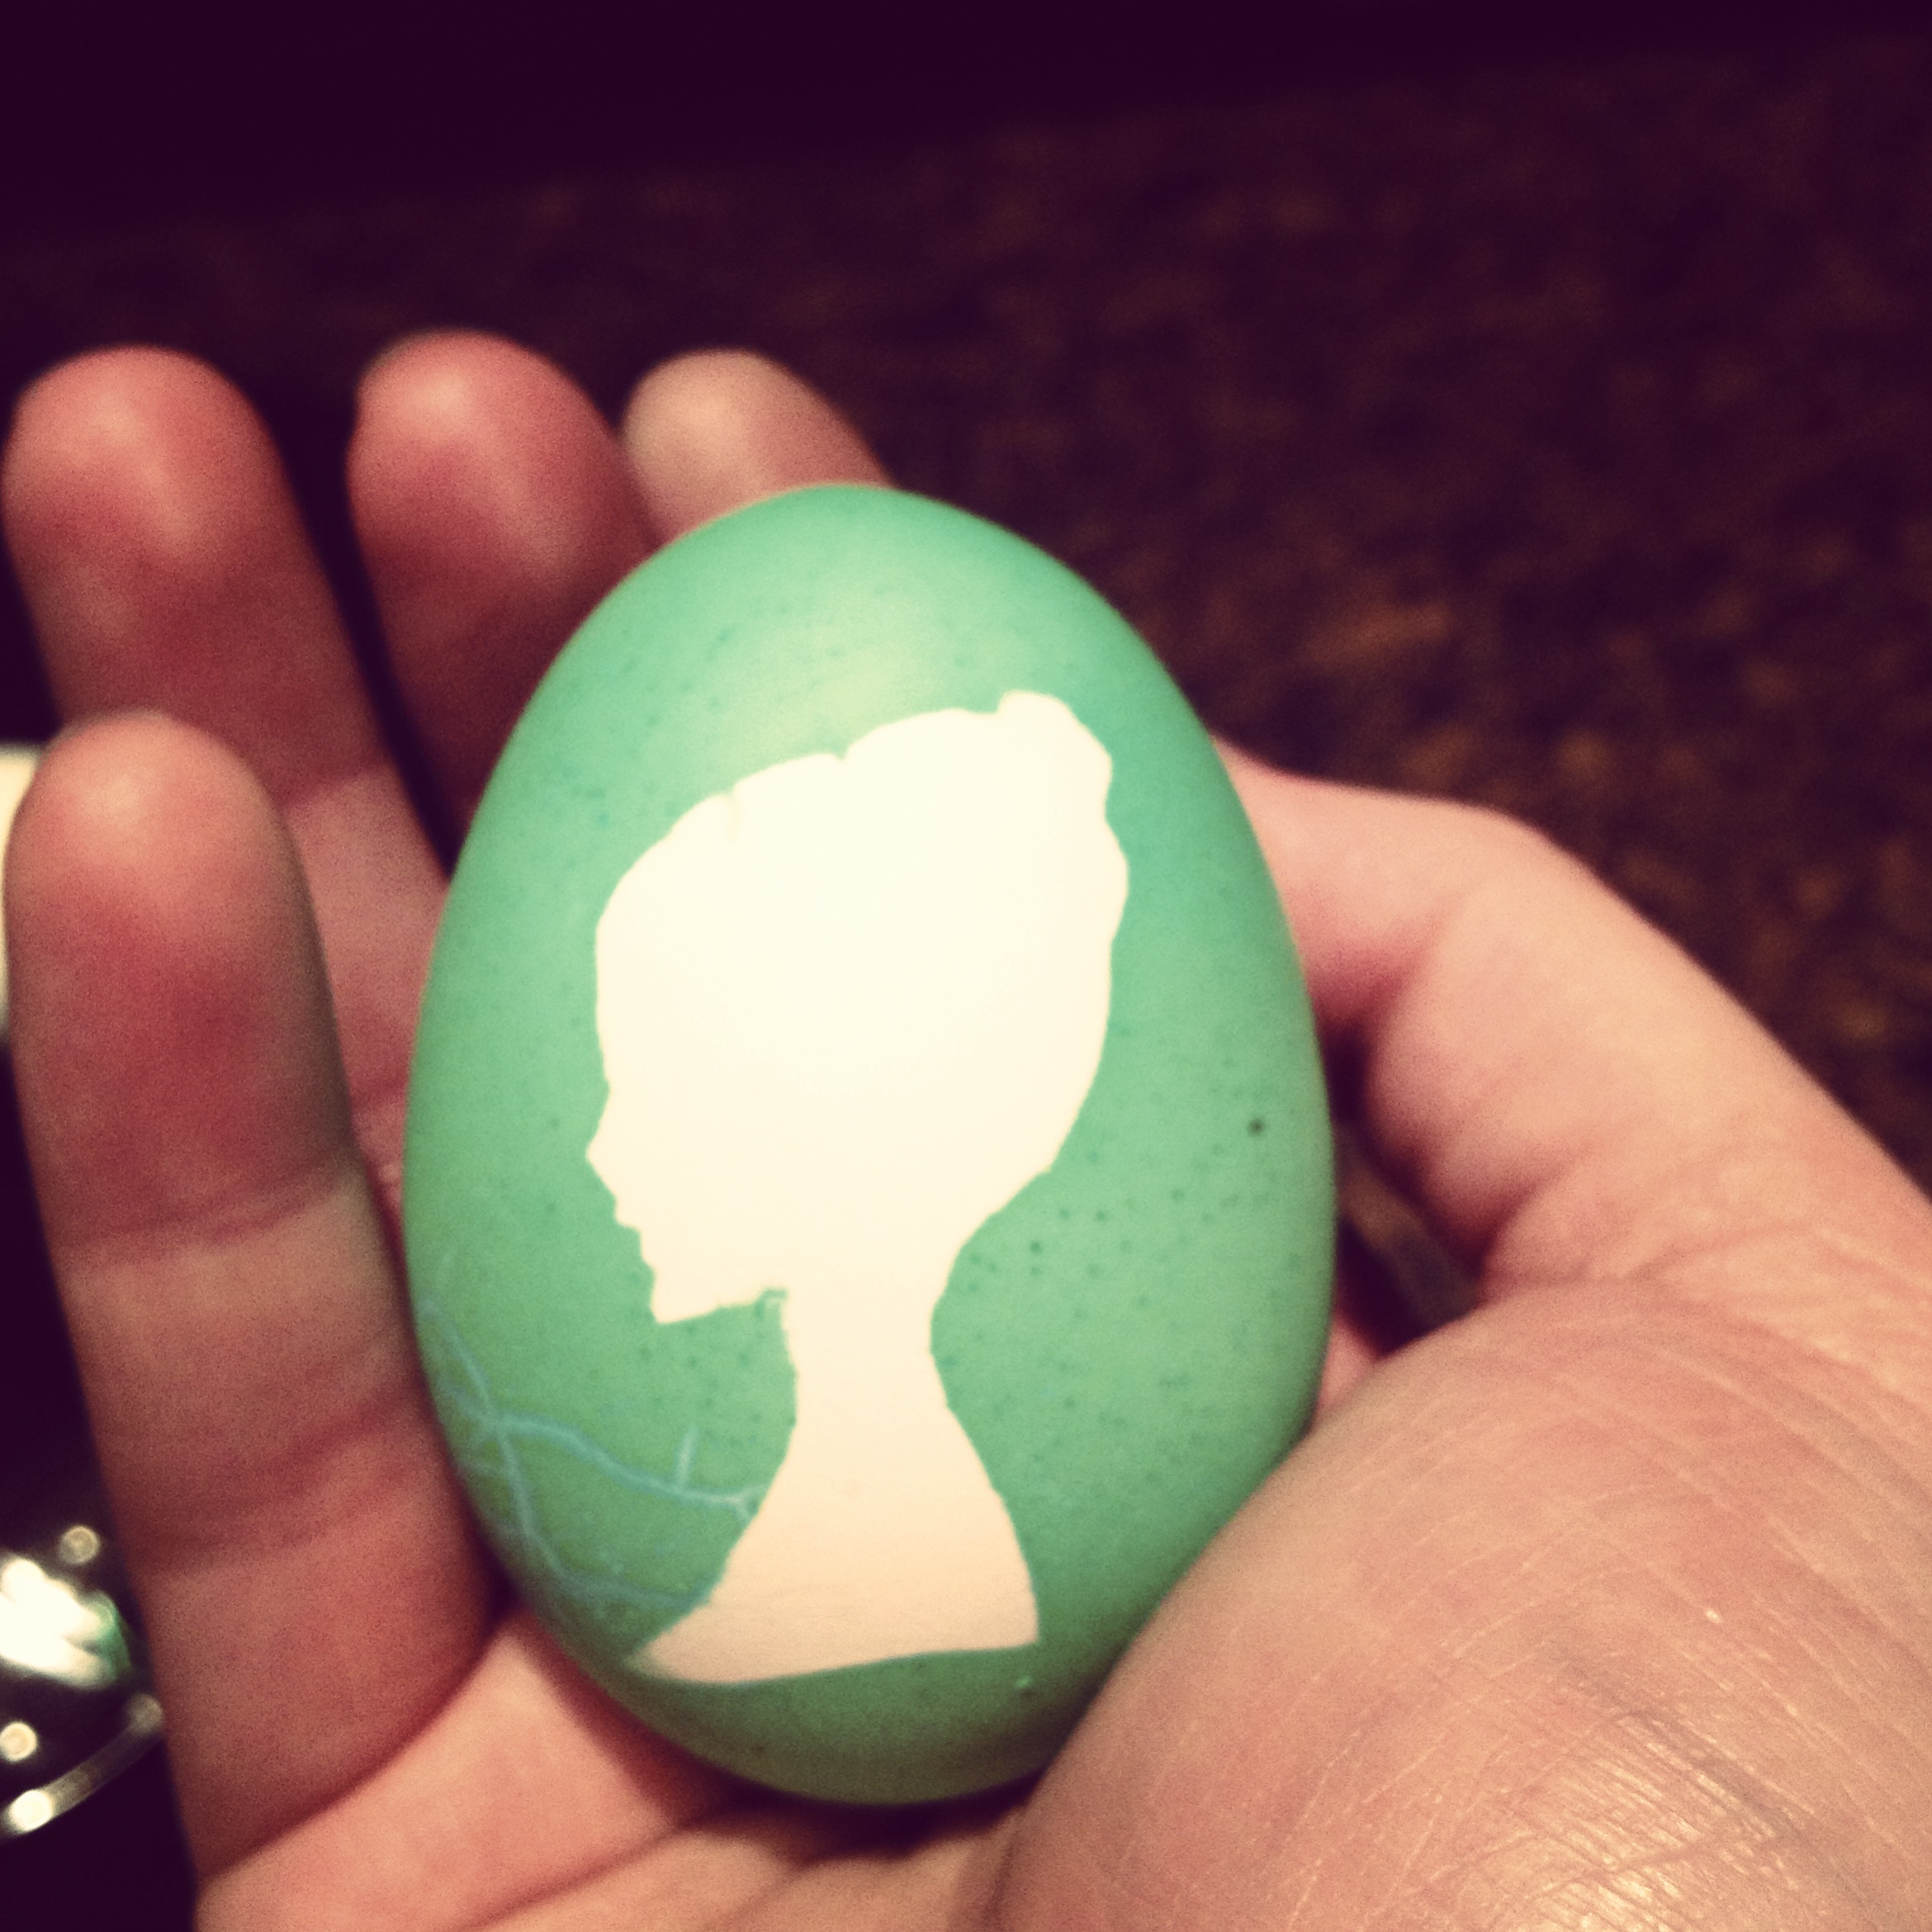
Oooo. Ahhhh.
These aren’t hard and they make really nice ornaments, gifts, or, um, snacks, especially for Passover and Easter, which are both coming up soon. The tutorial for how to make them is after the jump!
I want to first tell you that you have a few options for how hard you want to make this, okay? You can choose to either hard-boil the eggs OR hollow them out like they do in Russia. When we made these, my grandmother hollowed them out (she was Russian), but I just hard-boiled them because I’m an American and she did not pass this skill down to me. If you do that, you carefully puncture the base of the egg with a needle, then let it drain into a cup (scrambled eggs, anyone?), then carefully wash out the eggs with water and let them dry. If you go this route, you can make pretty ornaments with your finished product by hot-gluing a ribbon to the pointier end of the egg.
The other panic switch you can flip is doing your own silhouette versus doing a stock silhouette (this is what I did). If you DIY yours, you need a bright light, a big sheet of paper, some painters tape, a nice friend to trace your silhouette, and the patience to do this. We did this one when I was a kid because my grandparents were retired and because they were becoming ornaments. If you’re just going to look at these for a couple days then eat them, I cannot imagine why you’d do it this way.
So let’s get started. The things you will need are:
vinyl self-adhesive sheets
craft scissors
a silhouette that stands about two inches high. I should say this needn’t be a person. You could do a duck or a letter or whatever you want.
eggs
dye (or tea!)
dash of vinegar
Prep your eggs however you like, but make sure they’re super-dry, then lay them aside.
Next, cut your silhouette out with your craft scissors, then apply that stencil to the vinyl. Cut that out.
Then, you’re going to peel the backing off and stick it to the egg. Make sure there aren’t any bubbles or wrinkles. If there are, the dye will leak in and you’ll have to start over. You’ll be so sad because this is a touch time consuming and then it will be for naught. I’m speaking from experience, so I just ate the one I messed up instead of showing it to y’all.
Prep your dye in a vessel of some description. I just used a coffee mug since I could just do one at a time, but no matter how you do it, make sure to add a splash o’ vinegar to make your colors brighter. Remind me to tell you about my elaborate, one gross of eggs dying operation closer to Easter. Dunk that in there for a few minutes, then take it out and let it dry completely before you remove the stencil. Restick your stencil as many times as you feel like you reasonably can. I only had four eggs in my house and it worked on all of them, but I felt like I was cutting it close there at the end.
Optional step: don’t tell your household you’ve done this and let them be freaked out when they open the fridge.
And that’s it. You have silhouette eggs! They’re not expensive to make, they don’t take that long, and everyone will think you’re so good at everything when you roll these out, which is the ultimate point of every single one of my craft projects.
What do you think? Are you going to make these? I wish you would. Make them! Email me the pictures!
